
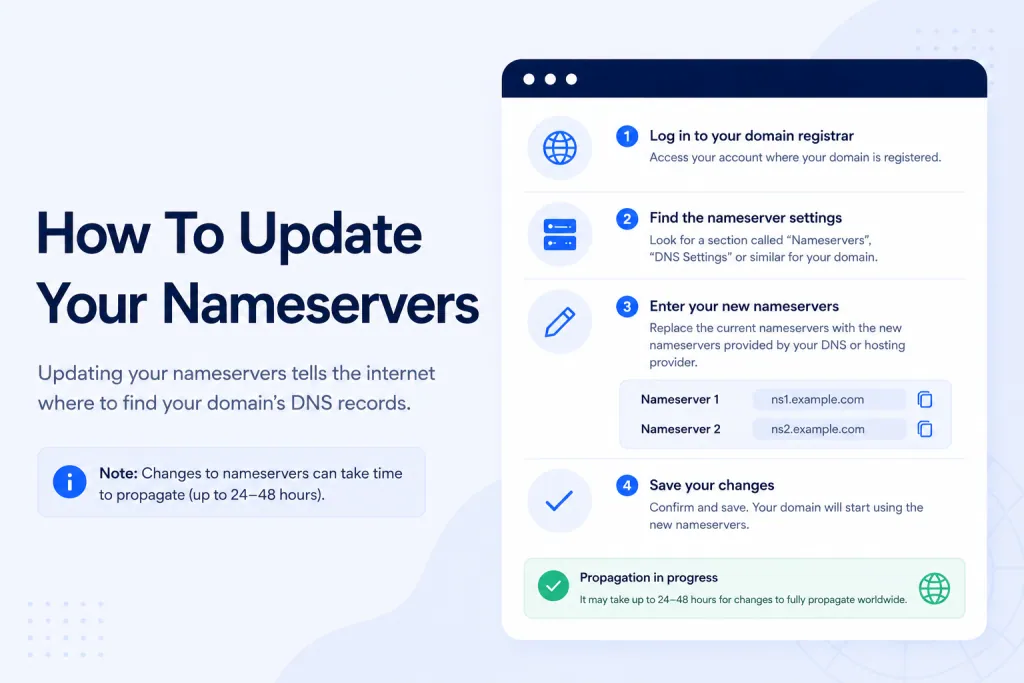
Short answer: To update your nameservers, log in to your domain registrar (the company you bought the domain from — GoDaddy, Namecheap, Cloudflare Registrar, etc.), find the nameserver settings for your domain, paste in the nameservers shown in your PBN LTD dashboard, and save. DNS then propagates within 72 hours (usually much sooner). Full step-by-step below — written for total beginners.
💡 Quick refresher — what are nameservers?
Nameservers are the “address book” of the internet for your domain. They tell every browser, app and email server in the world where your website actually lives. When you switch to PBN LTD, you point your domain’s nameservers at us, and from that moment on we handle the rest — hosting, CDN, SSL, the lot.
You set nameservers at your registrar (the company you bought the domain from) — not at PBN LTD, and not in your DNS records. Common registrars include GoDaddy, Namecheap, Cloudflare Registrar, Google Domains / Squarespace Domains, Hover, Porkbun, IONOS, 123-Reg, and many more.
🧠 Why does each of my domains have different nameservers?
Unlike traditional hosts that hand every customer the same two nameservers (e.g. ns1.bighost.com / ns2.bighost.com), PBN LTD generates a unique nameserver pair for every domain you add. This is deliberate, and there are three big reasons for it:
- Privacy & reduced footprint — your domains can’t be easily clustered together or fingerprinted as belonging to the same owner just by looking up their nameservers. No detectable patterns linking your sites.
- Scalability & resilience — spreading domains across many nameserver pairs means a single point of congestion or attack can’t take down your whole portfolio at once.
- Tailored to your stack — each pair is generated based on the CDN and DNS provider you selected during setup for that specific domain, so they’re routed optimally for the services that domain actually uses.
So always copy the nameservers from the dashboard row for the exact domain you’re updating — never reuse a pair from another domain you own. They won’t work.
📋 Before you start — get your PBN LTD nameservers
Every domain on PBN LTD is assigned its own pair of nameservers. Don’t copy them from another article or another domain — yours are unique. Here’s how to find them:
- Log in to your PBN LTD dashboard.
- Find your domain in the main domain list.
- Look directly beneath the domain name — you’ll see two nameservers listed (something like
jeff.ns.cloudflare.comandlaura.ns.cloudflare.com, or similar — they’re randomly generated per domain). - Copy them exactly. Even one wrong character will break everything. We recommend copy-paste, not typing them out by hand.

🧭 How to update your nameservers — step by step (any registrar)
The exact menu names vary slightly between registrars, but the process is essentially identical everywhere. Follow these steps and you’ll be done in under five minutes:
- Log in to your domain registrar — this is the company you bought the domain from (GoDaddy, Namecheap, Cloudflare Registrar, Google Domains, Hover, etc.). Not sure who your registrar is? Look at your email — there’ll be a renewal or purchase receipt from them.
- Find your domain in the registrar’s control panel. It’s usually under “My Domains”, “Domain List” or “Domain Manager”.
- Click into the domain and look for a section called one of: Nameservers, DNS, DNS Management, or Domain Settings.
- Switch the setting from “Default / Registrar nameservers” to “Custom nameservers” (the wording varies — sometimes it’s a toggle, sometimes a dropdown).
- Delete any existing nameservers that are listed (usually two or four entries belonging to your old host or your registrar’s defaults).
- Paste in the two PBN LTD nameservers you copied from your dashboard. Most registrars want them in two separate boxes (NS1 and NS2). Some allow a third or fourth — leave those blank, you only need the two.
- Save your changes. Most registrars confirm with a green tick or success message.
- Wait for propagation — usually 15 minutes to 4 hours, occasionally up to 72 hours. Your dashboard will move from “Waiting DNS Update” → “Activating CDN” → “OK” as it happens.
💡 Can’t find the nameserver settings on your registrar?
Every registrar’s interface is slightly different. The fastest way to find the exact menu on your registrar is to Google it:
- Search: “How do I update nameservers on [your registrar’s name]”
- Example: “How do I update nameservers GoDaddy”, or “Change nameservers Namecheap”
- The registrar’s own help center will usually be the top result with screenshots.
- Or ask ChatGPT / Claude — works brilliantly. Just say “Step by step, how do I change nameservers on [registrar]?”
🚫 Common mistakes to avoid
About 9 out of 10 “my nameservers won’t work” support tickets are caused by one of these mistakes. Read through them before you save:
- Updating DNS records instead of nameservers. If you’re being asked for IP addresses, A records, or CNAME records, you’re in the wrong section. You need the Nameservers setting — usually one menu level higher.
- Typos. An extra dot, a missing letter, or merging two nameservers into one (e.g.
jeff.ns.cloudflare.comvsjeff.ns.cloudflarecom) will break everything. Always copy-paste, never retype. - Leaving old nameservers in. If your registrar has four slots and you only replace two, the leftover two will fight ours. Delete every old entry before pasting in the new ones.
- Adding extra nameservers that aren’t ours. Some registrars try to “helpfully” auto-fill extras. Remove anything that isn’t one of the two we gave you.
- Pointing nameservers at PBN LTD before adding the domain to your PBN LTD dashboard. You must add the domain in our dashboard first so we can provision the CDN zone — then update the nameservers.
- Hitting save and instantly panicking. DNS propagation is not instant. Give it at least 15 minutes before you assume something’s wrong.
⏳ What happens after I save?
Once you’ve saved the new nameservers at your registrar, the rest happens automatically. Here’s what to expect:
- DNS propagation begins. Your registrar tells the global DNS system about the change. Most resolvers worldwide pick it up within 15 minutes to 4 hours.
- Your dashboard status updates. The domain will move from “Waiting DNS Update” → “Activating CDN” → “OK”.
- SSL is auto-issued (if you selected SSL when adding the domain) — usually within a few minutes of reaching the “Activating CDN” stage.
- ✅ “OK” status means everything is live: DNS resolved, CDN active, SSL issued. You’re done.
If you’ve updated the nameservers and the dashboard status hasn’t moved within a few hours, give it the full 72-hour window before worrying. If it’s still stuck after 72 hours, run through the DNS troubleshooting guide below.
🆘 Updated the nameservers but my site still isn’t loading?
If you’ve waited the full 72 hours and your site still isn’t resolving, the cause is almost always one of these:
- A typo in the nameservers at your registrar — go back and double-check character by character.
- DNSSEC is enabled at your registrar and is blocking the change — must be turned off.
- The CDN zone has expired because the nameservers stayed pointed elsewhere for too long after you added the domain.
- The registrar reverted your nameservers after a late renewal.
- A registrar-level issue (suspension, hold, transfer lock, pending verification).
Each of these has a step-by-step fix in our complete troubleshooting guide: DNS Resolution & Important Considerations →
📚 Related articles
- DNS Resolution & Important Considerations — the full troubleshooting guide if your nameservers won’t take.
- Can I add My Own TXT Records? — for domain verification, email (SPF/DKIM/DMARC) and more.
- Can I Change the CDN Provider for My Domain? — if you want to swap CDN after going live.
- Which CDN Should I Use? — picking the right CDN before you change nameservers.