
Short answer: yes — and it’s now a one-click job. You can move your site to a different CDN yourself, straight from your dashboard — no backups, no deleting and re-adding, and no downtime. We keep your current CDN running until the new one is proven to be serving your site, then switch you over.
💡 Heads-up
This replaces the old method. You no longer need to back up, remove and re-add your site to change CDN — just open the CDN tab and click Move to. Your current CDN keeps serving until the new one is ready, so your site stays online throughout.
Opening the CDN tab
Every setting for a site lives on its control panel. To reach the CDN options:
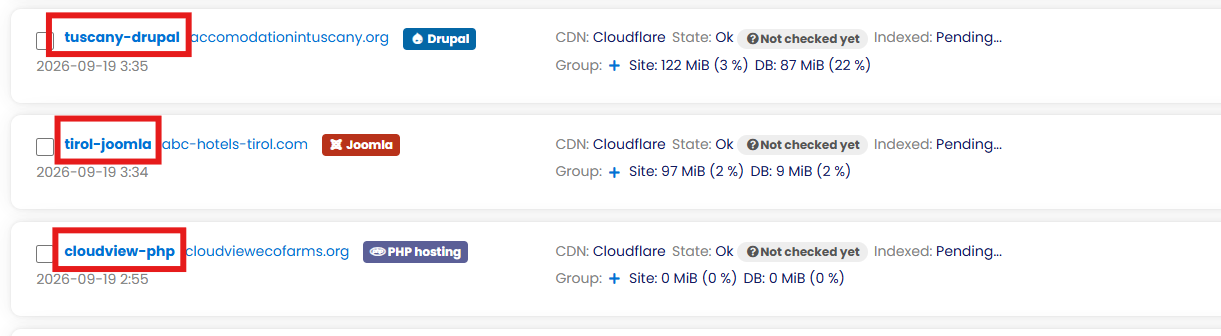
- In your dashboard, click the site name of the domain you want to change.
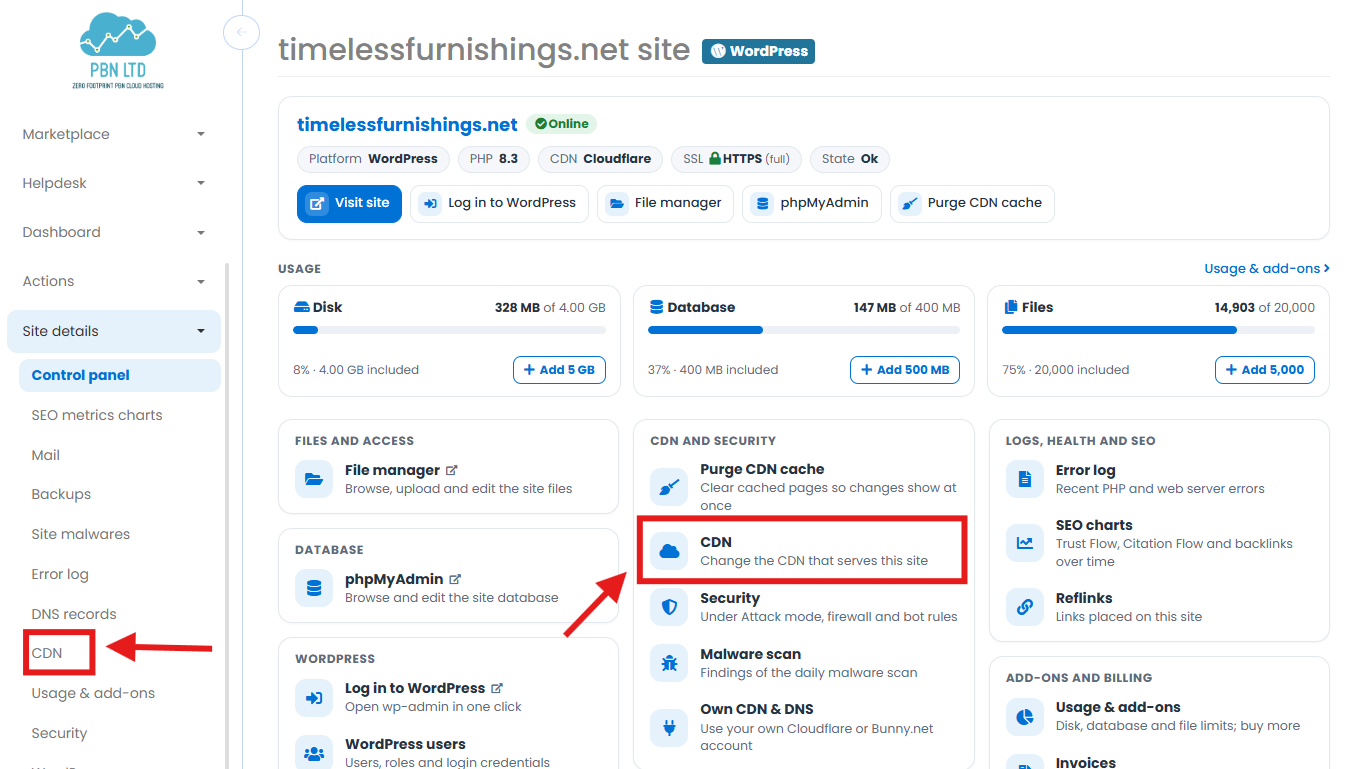
On the site’s Control panel, open CDN — either the CDN card (Change the CDN that serves this site) or Site details → CDN in the left-hand menu.
Moving to a new CDN
The CDN page shows the provider your site is on now, plus every other one you can move to — each with its own Move to… button.
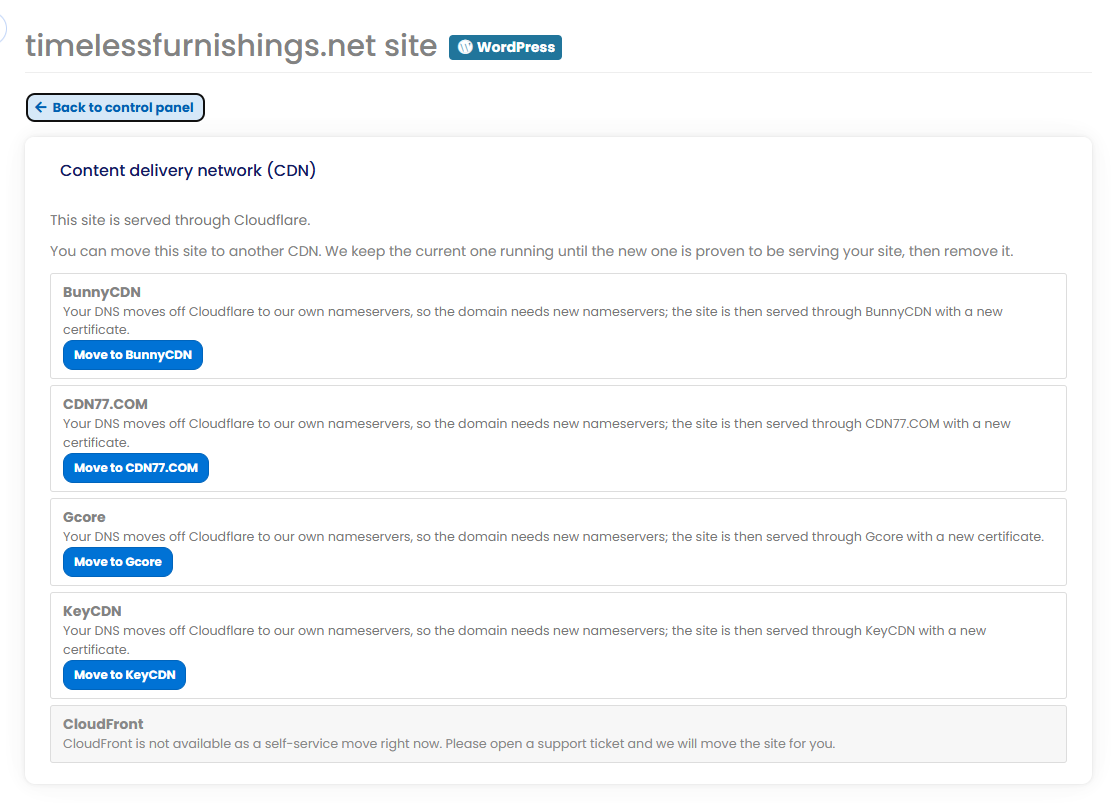
- Find the CDN you want and click Move to [provider].
- Read the confirmation — it tells you in plain English exactly what will happen: whether anything needs to change at your registrar, whether we’ll set the nameservers for you, what happens to HTTPS, and that your old CDN is only removed once the new one is serving.
- Confirm, and the move starts. The page shows its progress, and you can leave and come back — you don’t have to sit and watch it.
What happens during the move
The whole process is built so your site can’t go dark. Here’s what’s going on behind that one click:
- Your old CDN keeps serving until the new one is proven to be working — that means your site is healthy, the domain points at the new CDN, and (for an HTTPS site) a real secure connection succeeds.
- Only then, and only after a further 30 minutes, is anything removed at the old provider. If the move never proves out, it’s marked failed and nothing is removed — you stay exactly where you were.
- Nameservers are handled for you where possible. If your domain is in a registrar account you’ve connected, we set the new nameservers automatically; otherwise the confirmation shows you exactly what to change. See Automatically Update Nameservers and How To Update Your Nameservers.
💡 A brief HTTPS note
Every CDN except Cloudflare issues its security certificate only once your domain is pointing at it, so just after a move you might see a few minutes of slowness or a certificate warning — it clears itself. Moving to Cloudflare has no such gap. More on this in How to Enable & Use SSL (HTTPS) on Your Websites.
Which CDNs can I choose?
You can self-serve a move between Cloudflare, BunnyCDN, CDN77, Gcore and KeyCDN. Not sure which suits your site? See Which CDN Should I Use?.
Occasionally a provider’s button is greyed out with the reason shown in plain English — for example “KeyCDN has no room for another site right now”, “Bunny is HTTPS only and this site is set to plain HTTP”, or “this site is paused”. Fix the reason given (or pick a different CDN) and the option comes back.
Moving to or from CloudFront
CloudFront (Amazon) isn’t a self-service move just yet. If you want your site on CloudFront, open a support ticket and we’ll move it for you. Moving away from CloudFront to any of the self-service CDNs works from the CDN page as normal.
✅ Quick summary
Changing CDN is now one click: open the site’s Control panel → CDN, click Move to the provider you want, and confirm. Your old CDN keeps serving until the new one is proven, so there’s no downtime — and if anything fails, nothing is removed. Self-service covers Cloudflare, BunnyCDN, CDN77, Gcore and KeyCDN; for CloudFront, open a support ticket and we’ll do it for you.