How To Access Your NTCloud Dashboard (Subdomain Creation Guide)

How To Access Your NTCloud Dashboard (Subdomain Creation Guide)

How To Access Your NTCloud Dashboard (Subdomain Creation Guide)

So you’ve just had NTCloud hosting opened up on your domain — congrats! Your subdomain package is now active and you have a full hosting dashboard with file manager, databases, FTP/SSH, one-click installs, the lot. This guide walks you through exactly how to access your new NTCloud dashboard from your PBN LTD account, what every section does, and the few gotchas to be aware of (DDoS protection, backups and the firewall). In plain English, step by step.

📺 Prefer to watch instead of read? The video above is a full walkthrough of the NTCloud dashboard with Nia — every section, every option, every gotcha. The written guide below covers the same ground, with extra detail you can refer back to.

💡 Heads-up before you start: NTCloud is a completely separate hosting platform from PBN LTD — different dashboard, different features, different rules. Your PBN LTD account is now just for billing. Everything else (file manager, databases, subdomains, SSL, caching) lives inside the NTCloud control panel. Don’t worry though, it’s much simpler than it sounds.

📁 Quick vocab so nothing’s confusing:

  • PBN LTD — the dashboard you signed up through. From now on, it just handles your billing. Nameservers, DNS, files, databases etc. are all done elsewhere now.
  • NTCloud — the actual hosting platform behind your subdomain-enabled domains. This is where the real action happens: files, subdomains, SSL, databases, the lot.
  • Linux Unlimited — the label NTCloud shows next to a domain that has the full hosting package enabled (rather than just email).
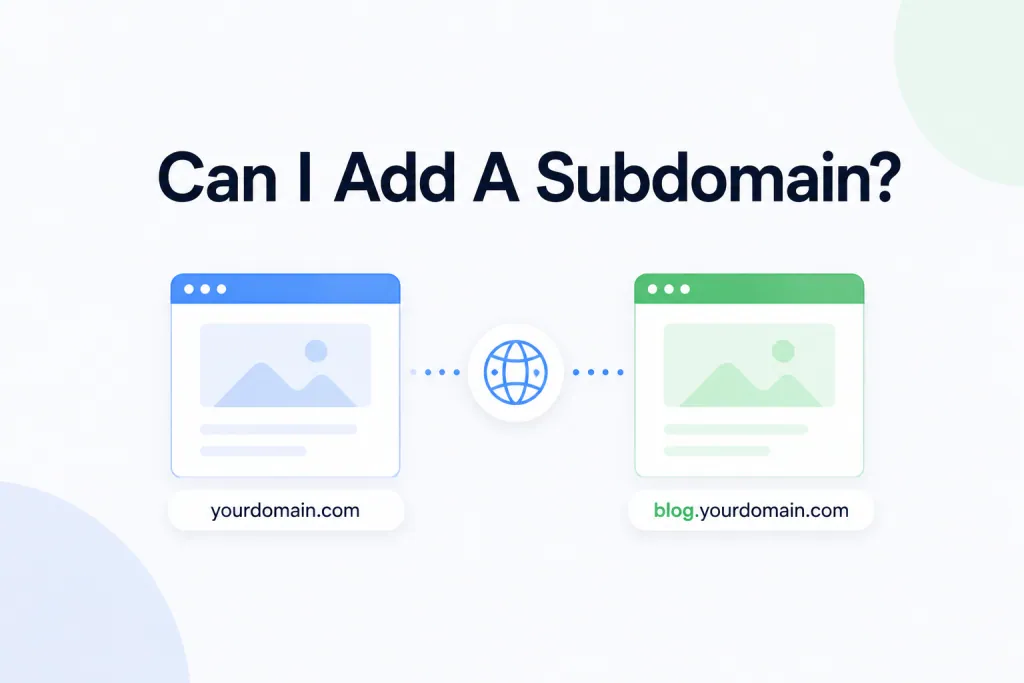
  • Subdomain — an extra hostname under your main domain (e.g. blog.yourdomain.com or hello.yourdomain.com).
  • Root domain — the main domain itself, with no subdomain prefix (e.g. yourdomain.com).
  • Document root — the folder on the server where a domain or subdomain’s files live (usually inside public_html).
  • Edge Caching — NTCloud’s own built-in CDN, used to speed up your site by caching pages closer to visitors.

⚠️ Before You Start — Quick Prerequisites

If you’re reading this guide, you’ve probably already had us open up your subdomain package on NTCloud — so you can skip ahead. But just so it’s clear: two things had to be in place on your PBN LTD account before we could enable NTCloud hosting for your domain:

  • The root domain had to be added to your PBN LTD account first. You did not need to update the nameservers shown in PBN LTD — those won’t be used.
  • The “Create SMTP server” tickbox had to be ticked when the domain was added. This is what lets NTCloud’s email system see the domain, which is the bit that lets us “promote” it to full NTCloud hosting.
  • Then you submitted a support ticket requesting subdomain / full hosting access, and we enabled it for you.

💡 Need this opening up for another domain? No problem — you can request the full NTCloud package for as many domains as you like, and you can even ask for multiple domains to be opened up in the same support ticket.

💡 Smart tip — re-use the credentials PBN LTD already generated

When you added your root domain to PBN LTD, the dashboard auto-generated a WP Username and WP Password for that domain — visible on the site overview screen (even while the domain is still showing Waiting DNS update). Since PBN LTD’s one-click login won’t be used on NTCloud-hosted domains, those credentials are just sitting there unused.

When the NTCloud install wizard asks you to set your WordPress username and password, just copy and paste those PBN-LTD-generated credentials. That way you don’t have to invent anything, you don’t have to write them down separately, and they’ll always be sitting there in PBN LTD as a reference you can copy back any time.

⚠️ Heads-up: Once you set those credentials in NTCloud, NTCloud owns them. If you later change the password from inside WordPress, the copy shown in PBN LTD will be stale. Best practice is to also save the final credentials in a password manager. If you ever lose them, you’ll need to reset them via the database (phpMyAdmin) — we don’t store NTCloud WordPress logins on our side.


🔑 How To Access Your NTCloud Dashboard

This bit confuses people the first time — but it’s genuinely simple once you’ve seen it. You access NTCloud through the “Manage Emails” area in your PBN LTD dashboard. Sounds weird, right? It’s because NTCloud is the same platform that runs our email service, so the email panel is your door into NTCloud. Here’s exactly how:

  1. Log in to your PBN LTD dashboard as you normally would.
  2. Click on the site name of the domain you want to manage.
  3. Open the Site Functions dropdown and click “Manage Emails”. (Yes, the menu says emails. Trust us — that’s the route into NTCloud!)
  4. You’re now inside NTCloud. Find your domain in the list — next to it, you’ll see “Linux Unlimited” instead of “Email”. That’s the full hosting package showing up.
  5. On the right-hand side, click Manage.
  6. Welcome to your NTCloud control panel! 🎉 Everything for this domain is now done here.

One easy way to remember: PBN LTD = billing, NTCloud = everything else. If it’s about money, you’re in PBN LTD. If it’s about your site, files, subdomains, SSL or caching, you’re in NTCloud.

⚠️ Do NOT delete the domain from your PBN LTD dashboard. Your PBN LTD account still handles billing for this domain. If you delete it from PBN LTD, it’ll also be removed from NTCloud — and all your files and hosting data will go with it. Leave it where it is!


🗺️ Quick Tour of the NTCloud Dashboard

Once you click Manage, you’ll see the full NTCloud control panel for your domain. It’s split into clear sections down the left-hand side. Here’s what each section is for, at a glance:

SectionWhat it doesUse it for…
CDN / Edge CachingNTCloud’s built-in CDN + cache controls.Purging cache after content changes; tweaking optimisation settings.
Web OptimisationAuto-minify HTML/CSS/JS + image optimisation.Speeding up your site (carefully — JS optimisation can break things).
Web FilesFile manager, FTP accounts, backups, web builder, Git.Uploading site files, managing folders, taking manual backups.
EmailMailbox management.Same email admin as before — nothing changes here.
Web ToolsDatabases, PHP version, PHP configuration.WordPress/CMS database admin, fixing memory or timeout errors.
Domain NamesDNS records + subdomain creation.Adding subdomains, A/CNAME/MX/TXT records, G Suite/M365 presets.
SecuritySSH, malware scan, SSL/TLS.Issuing SSL, running malware scans, enabling Force HTTPS.
Logs & StatsAccess/error logs + one-click installs.Diagnosing on-site errors; installing WordPress and other CMSes.

Below we’ll go through the most important sections one by one, so you know what’s where and which bits actually matter for day-to-day site management.


🌐 CDN & Edge Caching Section

This is the first section in the NTCloud dashboard. NTCloud comes with its own built-in CDN, and this is where you control it. You’re also welcome to use your own external CDN instead (Cloudflare, BunnyCDN, Amazon CloudFront, etc.) — just be aware that the moment you do, the SSL certificate is managed by that CDN, not by us.

Edge Caching

  • Purge the cache after big site updates.
  • Turn caches on/off as needed.
  • Configure custom cache settings if you really want to (the defaults are fine for most sites).

For most people, the only thing you’ll ever use Edge Caching for is purging the cache after updating content. The defaults handle the rest.

Web Optimisation

Optimise HTML, JavaScript, CSS and images automatically. This can make your site noticeably faster — but it can also break things if you’re heavy-handed. A few rules of thumb:

  • Always clear caches (NTCloud’s cache + your browser cache) after changing optimisation settings and then check your site properly.
  • JavaScript optimisation can break things like burger menus on mobile, sliders, animations, etc. If something breaks, just turn that one option off — no other fix needed.
  • Toggle things one at a time so you can tell exactly which option caused any issue.

Visitor Blocking & Statistics

You can also block visitors by country or IP address, view general site stats, and manage security headers from this section. Useful if you’re getting targeted spam, fake signups or unwanted traffic from specific regions.


📁 Web Files Section

Everything to do with the actual files on your hosting lives in this section. You’ll spend more time here than anywhere else.

  • File Manager — browse, upload, edit and delete files directly in your browser. No FTP needed.
  • FTP Accounts — create FTP credentials if you’d rather connect from a desktop client like FileZilla.
  • Backups — create manual backups of your site files (read the Backups section below for important info).
  • Web Builder — drag-and-drop site builder if you want to build a quick static site.
  • File Permissions — check (and fix) file/folder permissions if you’re getting permission-related errors on your site.
  • Git Version Control — manage Git repos directly on the server (most people won’t need this, but it’s there if you want to play).

📧 Email Section

Your mailboxes still live here — exactly the same as before. Create new addresses, change passwords, set up forwarders, manage spam settings, all the usual email admin stuff. Nothing changes about how email works on the domain just because you’re now on full NTCloud hosting.


🛠️ Web Tools Section

The under-the-hood stuff lives here:

  • Databases — create, manage and back up MySQL databases. You’ll only need this if you’re running something dynamic like WordPress. Static HTML sites don’t have a database.
  • PHP Version — switch between PHP versions for compatibility with your CMS or theme. WordPress generally likes the latest stable PHP.
  • PHP Configuration — tweak settings like:
    • display_errors for debugging (turn on temporarily if something’s broken).
    • max_execution_time if scripts are timing out.
    • memory_limit if WordPress complains about memory.
    • upload_max_filesize if you’re uploading big files.

🌍 Domain Names Section

This is one of the most important sections for subdomain creation. From here you can:

  • Add third-party DNS records — A, CNAME, MX, TXT, SRV and more.
  • Use preconfigured settings for popular services like Google Workspace (G Suite), Microsoft 365, etc. — one-click DNS setup for email and verification records.
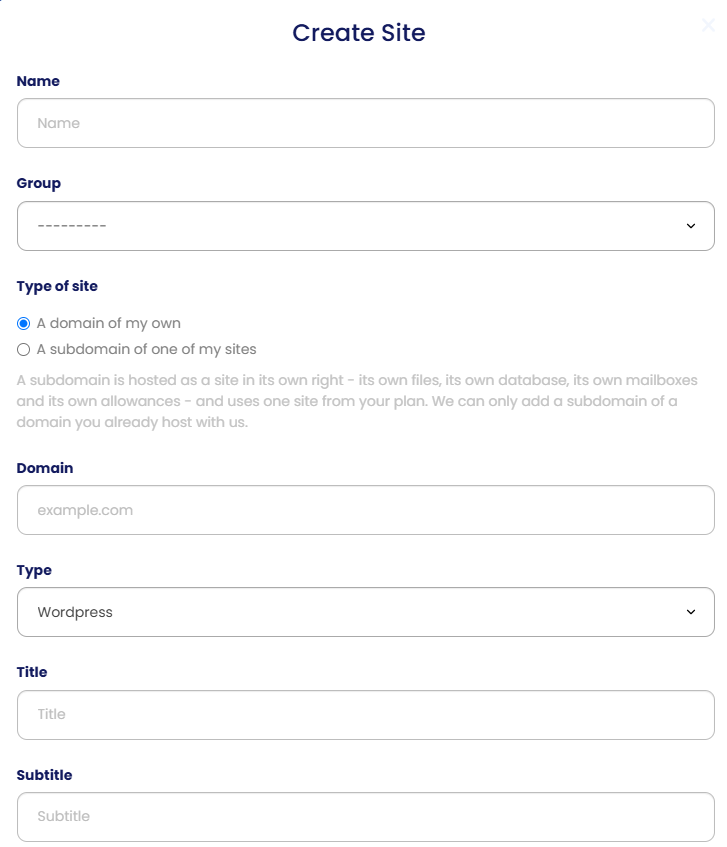
  • Add and manage subdomains — the whole reason you’re here!

Creating a subdomain (the actual steps)

  1. In the NTCloud control panel, go to Domain Names → Subdomains.
  2. In the Subdomain box, type the prefix you want (e.g. hello, blog, shop, app).
  3. Leave the Document Root field as the default value (NTCloud sets this up correctly for you automatically).
  4. Click Create Subdomain.
  5. Done! Now open the File Manager and inside public_html you’ll see a new folder for your subdomain. Whatever you put in that folder is what visitors see when they visit yoursubdomain.yourdomain.com.

Subdomains go live straight away as long as the root domain’s nameservers have already resolved on NTCloud. No additional setup needed.


🔒 Security Section

Three really important things live here:

SSH Access

SSH credentials and configuration. If you want command-line access to your server, this is where you set it up. Most users don’t need this, but it’s there if you do.

Malware Scan

  • Run a scan manually whenever you want.
  • Scans also run automatically once a week.
  • Any infected files get flagged here — check this tab if you suspect your site’s been compromised.

SSL / TLS Tab

This is where you issue and manage your free SSL certificate. This only works once your nameservers have fully resolved on NTCloud — until then, the SSL issue button simply won’t work.

  1. Wait for your nameservers to fully resolve on NTCloud (use a tool like whatsmydns.net to confirm).
  2. Go to Security → SSL/TLS.
  3. Issue the SSL certificate for your root domain and any subdomains you’ve created.
  4. Enable Force HTTPS — this should always be ticked, so visitors are always served the secure (HTTPS) version of your site.

💡 SSL takes up to 30 minutes to work globally after issuing — and Force HTTPS can take the same to fully kick in. If your site still shows HTTP or a broken SSL warning, it’s almost certainly cached on your device. Always test on a hard refresh / cleared browser cache, otherwise you’ll just be seeing the old cached version.

⚠️ If you’re using your own external CDN (Cloudflare, BunnyCDN, etc.), SSL is managed by that CDN — not by NTCloud. Don’t issue SSL in NTCloud in that case; you’ll configure it inside your CDN’s dashboard instead.


📊 Logs, Stats & One-Click Installs

Logs & Stats

This section gives you:

  • Access logs — see who’s visiting, when, and what pages they’re hitting.
  • Error logs — when something goes wrong on your site, this is the first place to look. PHP errors, 500-error stack traces, and other server-side problems are recorded here.

Most on-site problems can be diagnosed from these logs without having to raise a support ticket — they’re often more useful than people realise.

One-Click Installs

NTCloud has a one-click installer for a huge variety of CMSes and apps — including:

  • WordPress
  • Joomla
  • Drupal
  • Magento, PrestaShop and other ecommerce platforms
  • Forum software (phpBB, MyBB)
  • Various scripts and utilities

Click the one you want, choose where to install it, and NTCloud handles the rest. WordPress is by far the most popular — there’s a dedicated walkthrough for that below.


⚙️ Installing WordPress (and Migrating Sites)

Whether you’re starting fresh or moving an existing site across, this bit is your job, not ours — but NTCloud makes it as painless as possible. Here’s how each scenario works.

Brand new WordPress install

NTCloud has a one-click WordPress installer in the dashboard. Head into the Logs, Stats & One-Click Installs section, find WordPress in the list, and follow the wizard. You’ll be asked to:

  • Pick the domain (or subdomain) you want to install to.
  • Choose the install path (usually leave it as the root, e.g. /).
  • Set your WordPress username and password (see the smart tip above about re-using the PBN LTD generated credentials).
  • Set your site title and admin email.
  • Click install and wait a few seconds — NTCloud does the rest.

💡 We don’t install WordPress for you on NTCloud — the one-click installer makes it a 30-second job. If you get stuck, raise a support ticket and we’ll point you in the right direction, but the actual install is yours to run.

Migrating an existing WordPress site over

If you’re moving an existing WordPress site across (from PBN LTD hosting, another host, or anywhere else), the migration is your responsibility — we don’t do migrations for users anymore. The easiest tool for the job is WP-Vivid Pro, and we offer a free WP-Vivid Pro license to make it as painless as possible.

  • Submit a support ticket asking for the WP-Vivid Pro plugin/license — we’ll get you set up with it free of charge.
  • Install WP-Vivid Pro on your source site (the one you’re moving from) and create a full backup/export.
  • On the destination — your new NTCloud-hosted WordPress install — install WP-Vivid Pro and use the import feature to pull in the backup.
  • Once imported, check everything looks right, then update DNS / nameservers as needed so traffic hits your new NTCloud site.

💡 Prefer another tool? UpdraftPlus, All-in-One WP Migration, Duplicator and similar plugins all work fine — pick whichever you’re most comfortable with. The free WP-Vivid Pro license is just the option we recommend because we know it well.

Static HTML sites (no WordPress)

If you’re running a static HTML site rather than WordPress:

  • Upload your files into the public_html folder using the NTCloud File Manager or an FTP client.
  • Make sure your homepage is named index.html (or index.php) so it loads by default.
  • Set file permissions correctly via the dashboard if you hit any 403 errors.
  • No database needed — static sites just serve files straight from the server.

🔁 Setting Up the WWW. Version of Your Site

This one catches a lot of people out, so pay attention: on NTCloud, you do NOT add www. as a subdomain. If you try to, it won’t work the way you’d expect.

Instead, you handle the www. version of your site by adding a small redirect to your .htaccess file (which lives in your root domain’s public_html folder). The redirect tells the server to send anyone visiting yourdomain.com to www.yourdomain.com instead (or vice versa).

Redirecting non-www → www.

Open .htaccess in your public_html folder via the NTCloud File Manager (enable “Show hidden files” if you can’t see it) and add this near the top:

RewriteEngine On
RewriteCond %{HTTP_HOST} ^yourdomain\.com$ [NC]
RewriteRule ^(.*)$ https://www.yourdomain.com/$1 [R=301,L]

Replace yourdomain.com with your actual domain. Save the file. Test it by visiting yourdomain.com in a fresh incognito window — it should redirect you to www.yourdomain.com.

Redirecting www. → non-www. (the other way round)

If you prefer your site to live at the bare domain without www., do this instead:

RewriteEngine On
RewriteCond %{HTTP_HOST} ^www\.yourdomain\.com$ [NC]
RewriteRule ^(.*)$ https://yourdomain.com/$1 [R=301,L]

💡 Pick ONE direction and stick to it. Either everyone goes to www., or everyone goes to the bare domain. Mixing both causes duplicate-content issues for SEO and weird-looking links.

⚠️ Don’t try to add www as a subdomain in the Subdomains tab. NTCloud handles www at the server level via .htaccess redirects, not as a separate subdomain. Adding it as a subdomain can cause SSL and routing issues.


🛡️ DDoS Protection — Important!

🚨 NTCloud does NOT include DDoS protection. This is standard money-site hosting — not the same managed setup as PBN LTD hosting. If your site is hit by a serious DDoS attack and there’s nothing in front of it to absorb the traffic, the site can be removed from the hosting to protect the wider NTCloud infrastructure for everyone else.

If you think your site is likely to attract attacks (gambling, adult, political, large-audience sites — anything controversial or competitive), using your own Cloudflare in front of NTCloud is essentially a must. Cloudflare’s free plan includes solid DDoS mitigation and is more than enough for most use cases. See our CDN Providers articles for setup guides.


💾 Backups (Manual Only!)

⚠️ NTCloud does NOT offer automatic backups. Backups are your responsibility — and you really, really need to take them.

For WordPress sites

  • WP-Vivid Pro — we offer a free license, just submit a support ticket asking for it. Easiest option and what we recommend.
  • UpdraftPlus, Jetpack Backup, All-in-One WP Migration — solid alternatives if you prefer them.
  • You can also use the backup tool inside the NTCloud Web Files section to snapshot files manually.

For static HTML sites

  • Zip the entire public_html folder from the NTCloud File Manager.
  • Download the zip and store it somewhere safe (cloud storage, local drive, both).
  • Do this regularly — at minimum any time you make significant changes.

🚧 Firewall & VPN Restrictions

NTCloud’s firewall is significantly stricter than PBN LTD’s. This is to keep money-site infrastructure safe from common attack vectors. What this means for you in practice:

  • VPN and proxy IPs are often automatically flagged and blocked, so you may not be able to access the NTCloud dashboard or even view your own sites while connected to one.
  • You might see a “checking your browser / not a robot” screen briefly when accessing the dashboard. That’s the firewall doing its job — just wait a moment.
  • Always access NTCloud from your real residential or business IP, not a VPN or shared proxy.

💡 If you keep getting blocked, the fix is almost always to disconnect from your VPN or switch off any proxy. The firewall logic is automatic and not something we can selectively disable per account.


🧾 Billing & Dashboard Responsibilities

Just to put it really clearly:

WhatWhere
Billing & subscriptionPBN LTD dashboard
WordPress login detailsYou set them yourself in the NTCloud install wizard — not stored on our side. Keep them in a password manager.
File manager, FTP, SSHNTCloud dashboard
Databases, PHP settingsNTCloud dashboard
Subdomain creationNTCloud dashboard (Domain Names → Subdomains)
DNS records (A/CNAME/MX/TXT)NTCloud dashboard (Domain Names section)
SSL certificateNTCloud dashboard (Security → SSL/TLS) — or your external CDN if used
CDN cache / purgingNTCloud dashboard (CDN / Edge Caching section)
MailboxesNTCloud dashboard (Email section)
On-site error diagnosisNTCloud dashboard (Logs & Stats)

🚨 Do NOT delete the domain from your PBN LTD dashboard. The domain on PBN LTD is what keeps the NTCloud package alive. Delete it from PBN LTD and it’ll be removed from NTCloud — taking all your files, databases and configuration with it. There is no undo button.

No extra charges. The full NTCloud package on domains we’ve enabled it for is included with your existing PBN LTD subscription — there’s nothing extra to pay.


❓ NTCloud Dashboard FAQs

Why is the NTCloud dashboard hidden behind “Manage Emails”?

Because NTCloud is the same underlying platform that runs our email services. When we enable full hosting on a domain, the email panel turns into the door into the full NTCloud control panel. It’s a quirk of the setup, not a deliberate puzzle — once you’ve done it once, it’s muscle memory.

Can I get NTCloud opened for multiple domains?

Yes — request as many domains as you like to have the full NTCloud package enabled. You can list multiple domains in the same support ticket to save back-and-forth.

Do I need NTCloud for subdomains specifically?

Yes — subdomains can only be created on the NTCloud side, not in PBN LTD’s standard hosting. PBN LTD doesn’t directly support subdomain creation, which is why we enable NTCloud hosting on the domain for you when you request it.

Can I use NTCloud hosting without needing subdomains?

Yes — if you just want more control over your hosting (file manager, databases, FTP/SSH, one-click installs etc.) and don’t need PBN LTD’s specific managed features, you can ask us to move your domain to NTCloud purely for the extra control. You don’t have to be planning subdomains.

Why won’t my SSL issue?

SSL can only be issued after your nameservers have fully resolved on NTCloud. Check propagation with a tool like whatsmydns.net. If the nameservers are live and SSL still won’t issue, give it 10 minutes and try again — and double-check there’s nothing else (like an external CDN already in front of the domain) intercepting traffic.

My site/SSL still shows broken after I issued it. Why?

Cache. It’s almost always cache. SSL propagation takes up to 30 minutes globally, and your device may be holding onto an old cached version of the site. Try a hard refresh (Ctrl+Shift+R / Cmd+Shift+R), clear your browser cache, or test in an incognito window.

Do I get one-click admin login (SSO) for NTCloud WordPress sites?

No — the PBN LTD one-click admin login doesn’t work on NTCloud-hosted domains. To log into WordPress, go to yourdomain.com/wp-admin/ and sign in using the username and password you set yourself during the WordPress install wizard on NTCloud. If you lose them, you’ll need to reset them via the database (phpMyAdmin) — so keep a copy somewhere safe like a password manager.

Can I use my own CDN instead of NTCloud’s Edge Caching?

Yes — Cloudflare, BunnyCDN, KeyCDN, Amazon CloudFront, Fastly etc. all work fine. Just remember: the moment you point your domain’s nameservers to an external CDN, that CDN takes over SSL and CDN-side troubleshooting. NTCloud handles the origin only from that point on.

Do you offer DDoS protection?

No — NTCloud is standard money-site hosting and does not include DDoS mitigation. If your site is likely to face attacks, putting your own Cloudflare (or similar) in front is strongly recommended. Without that protection, a serious attack can result in the site being removed to protect other customers on the infrastructure.

Do you offer automatic backups?

No — backups on NTCloud are manual and your responsibility. WordPress users can request a free WP-Vivid Pro license from us by raising a support ticket — easiest option for automated backups. Static HTML users should periodically zip and download their public_html folder via the NTCloud File Manager. Don’t rely on us to have a backup of your site — if you haven’t made one, it doesn’t exist.

Help — I keep getting blocked when I try to access NTCloud!

You’re almost certainly connecting through a VPN, proxy or shared/abused IP. Disconnect any VPN and try again from your real IP. The firewall is automatic and can’t be selectively disabled per account.

How do I add www. to my site?

You don’t add www as a subdomain on NTCloud — it’s handled at the server level via an .htaccess redirect (see the www. redirect section above for the exact code snippets).


✅ Quick Summary

  • Access NTCloud via PBN LTD → site name → Manage Emails. Find your domain, click Manage. Look for the “Linux Unlimited” label.
  • PBN LTD = billing only. NTCloud = everything else (files, subdomains, SSL, caching, etc.).
  • Subdomains live in Domain Names → Subdomains. Files go in public_html/yoursubdomain/.
  • SSL is in Security → SSL/TLS. Only works once nameservers have resolved. Allow up to 30 minutes globally.
  • www. is added via an .htaccess redirect — NOT as a subdomain.
  • No DDoS protection — use Cloudflare (or similar) if attacks are a concern.
  • No automatic backups — take manual backups (free WP-Vivid Pro license available on request).
  • Don’t access via VPN/proxy — the firewall will block you.
  • Never delete the domain from PBN LTD — it deletes the NTCloud package too.

That’s it — you’re now fully up to speed on the NTCloud dashboard. Pop back to this guide any time you need a refresher!

Share this article: